Summarize with AI
The New Editor
The new editor shows your app on a phone, exactly as members see it. To change something, you click it on the phone and change its settings on the right.
The screen, in three parts
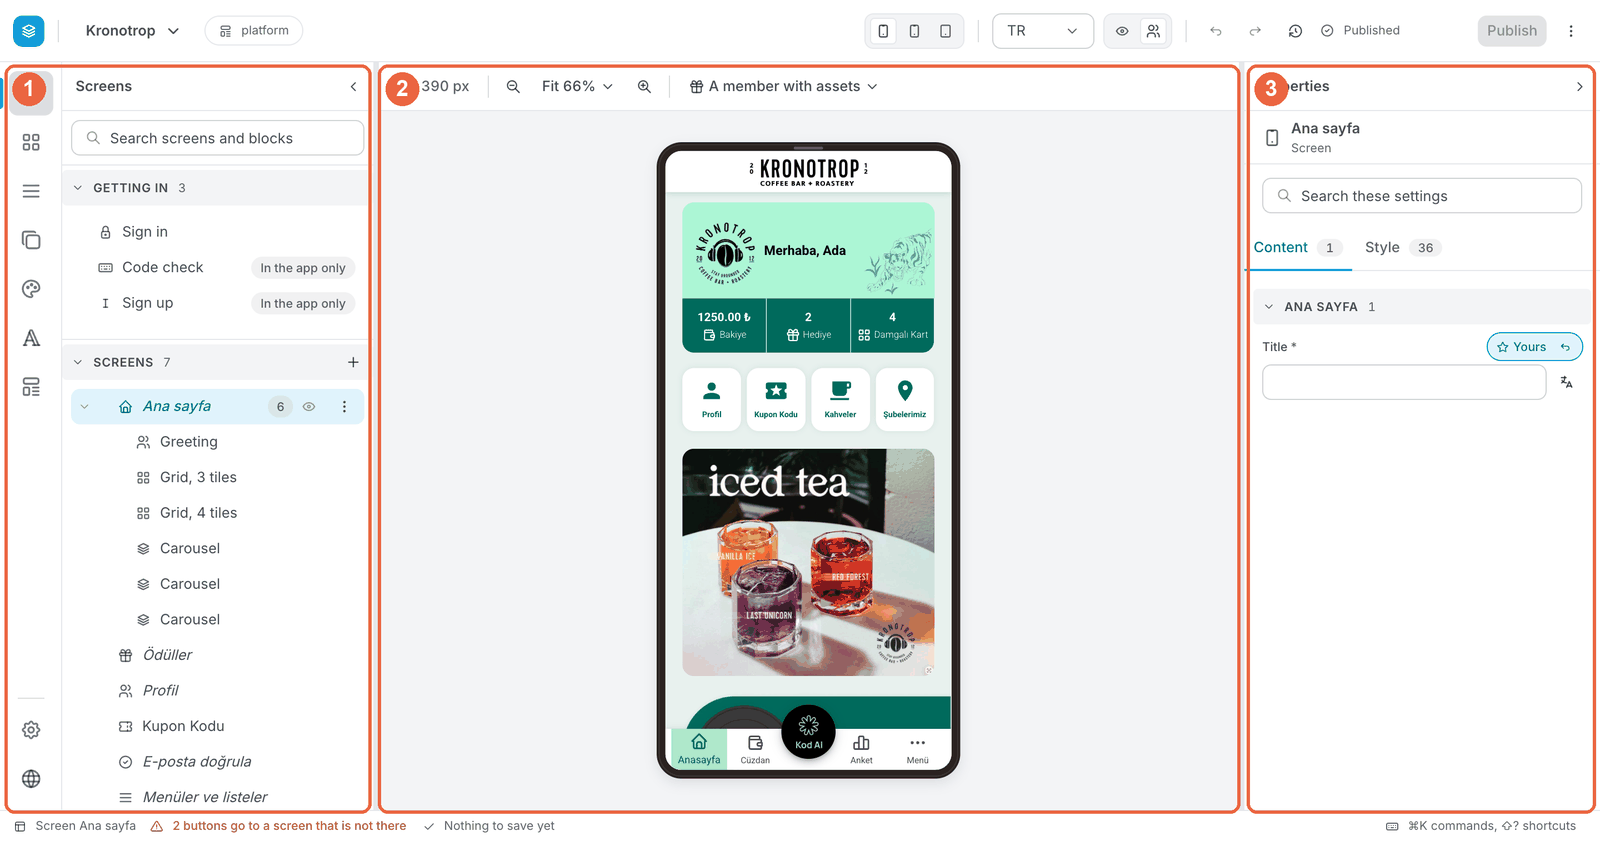
- Left: what your app is made of. A narrow bar of icons: Screens, Blocks, Navigation, Popups, Theme, Wording, Templates. Click one to open its list. Screens is the one you will use most: it lists every screen of your app and the pieces on each one.
- Middle: the phone. A live preview of your app. Click anything on it to select it.
- Right: Properties. The settings of whatever you selected. They are split into two tabs:
- Content: what it shows and what it does. A picture, a line of text, what happens when a member taps it, who sees it.
- Style: how it looks. Colours, sizes, corners, spacing.
For everyday changes, stay on Content
Changing a campaign picture, a link or who sees a slide never needs the Style tab. Style is for designing the look of the app, and it is easy to change something you did not mean to.
Three things worth knowing
- Nothing reaches your members until you press Publish. The editor saves your work by itself as you go, so you can try things, preview them and undo them first. See Publish, and undo a mistake.
- Your app is made of blocks. Your home screen is a stack of blocks: a greeting, a grid of buttons, one or more carousels of pictures. Each block has its own settings.
- "Yours" means you set it. A setting marked Yours holds your own value. Reset this field puts it back to the standard value.
Everyday tasks
Short, step-by-step pages for the changes you will make most often:
- Change a slider picture
- Add a new slide, or remove an old one
- Show a slide to some members only
- Make a slide open something when tapped
- Check it before your members see it
- Publish, and undo a mistake
Leave "Advanced" alone
At the bottom of the left bar there is an Advanced button. It holds tools for the support team, and the editor says so itself. You never need it to run your app.