Registration form
The Registration form is the public-facing form members fill in to join your loyalty program. Every field is customisable — you can reorder, hide, require, or add brand-new fields, each with placeholders, validation rules, and error messages. Configured at launch with the typical fields filled in; come here when the form needs to evolve.
Screenshots on this page show one merchant's setup (Spanish labels). Your Hub displays the labels and content you configure for your own program.
What you'll see
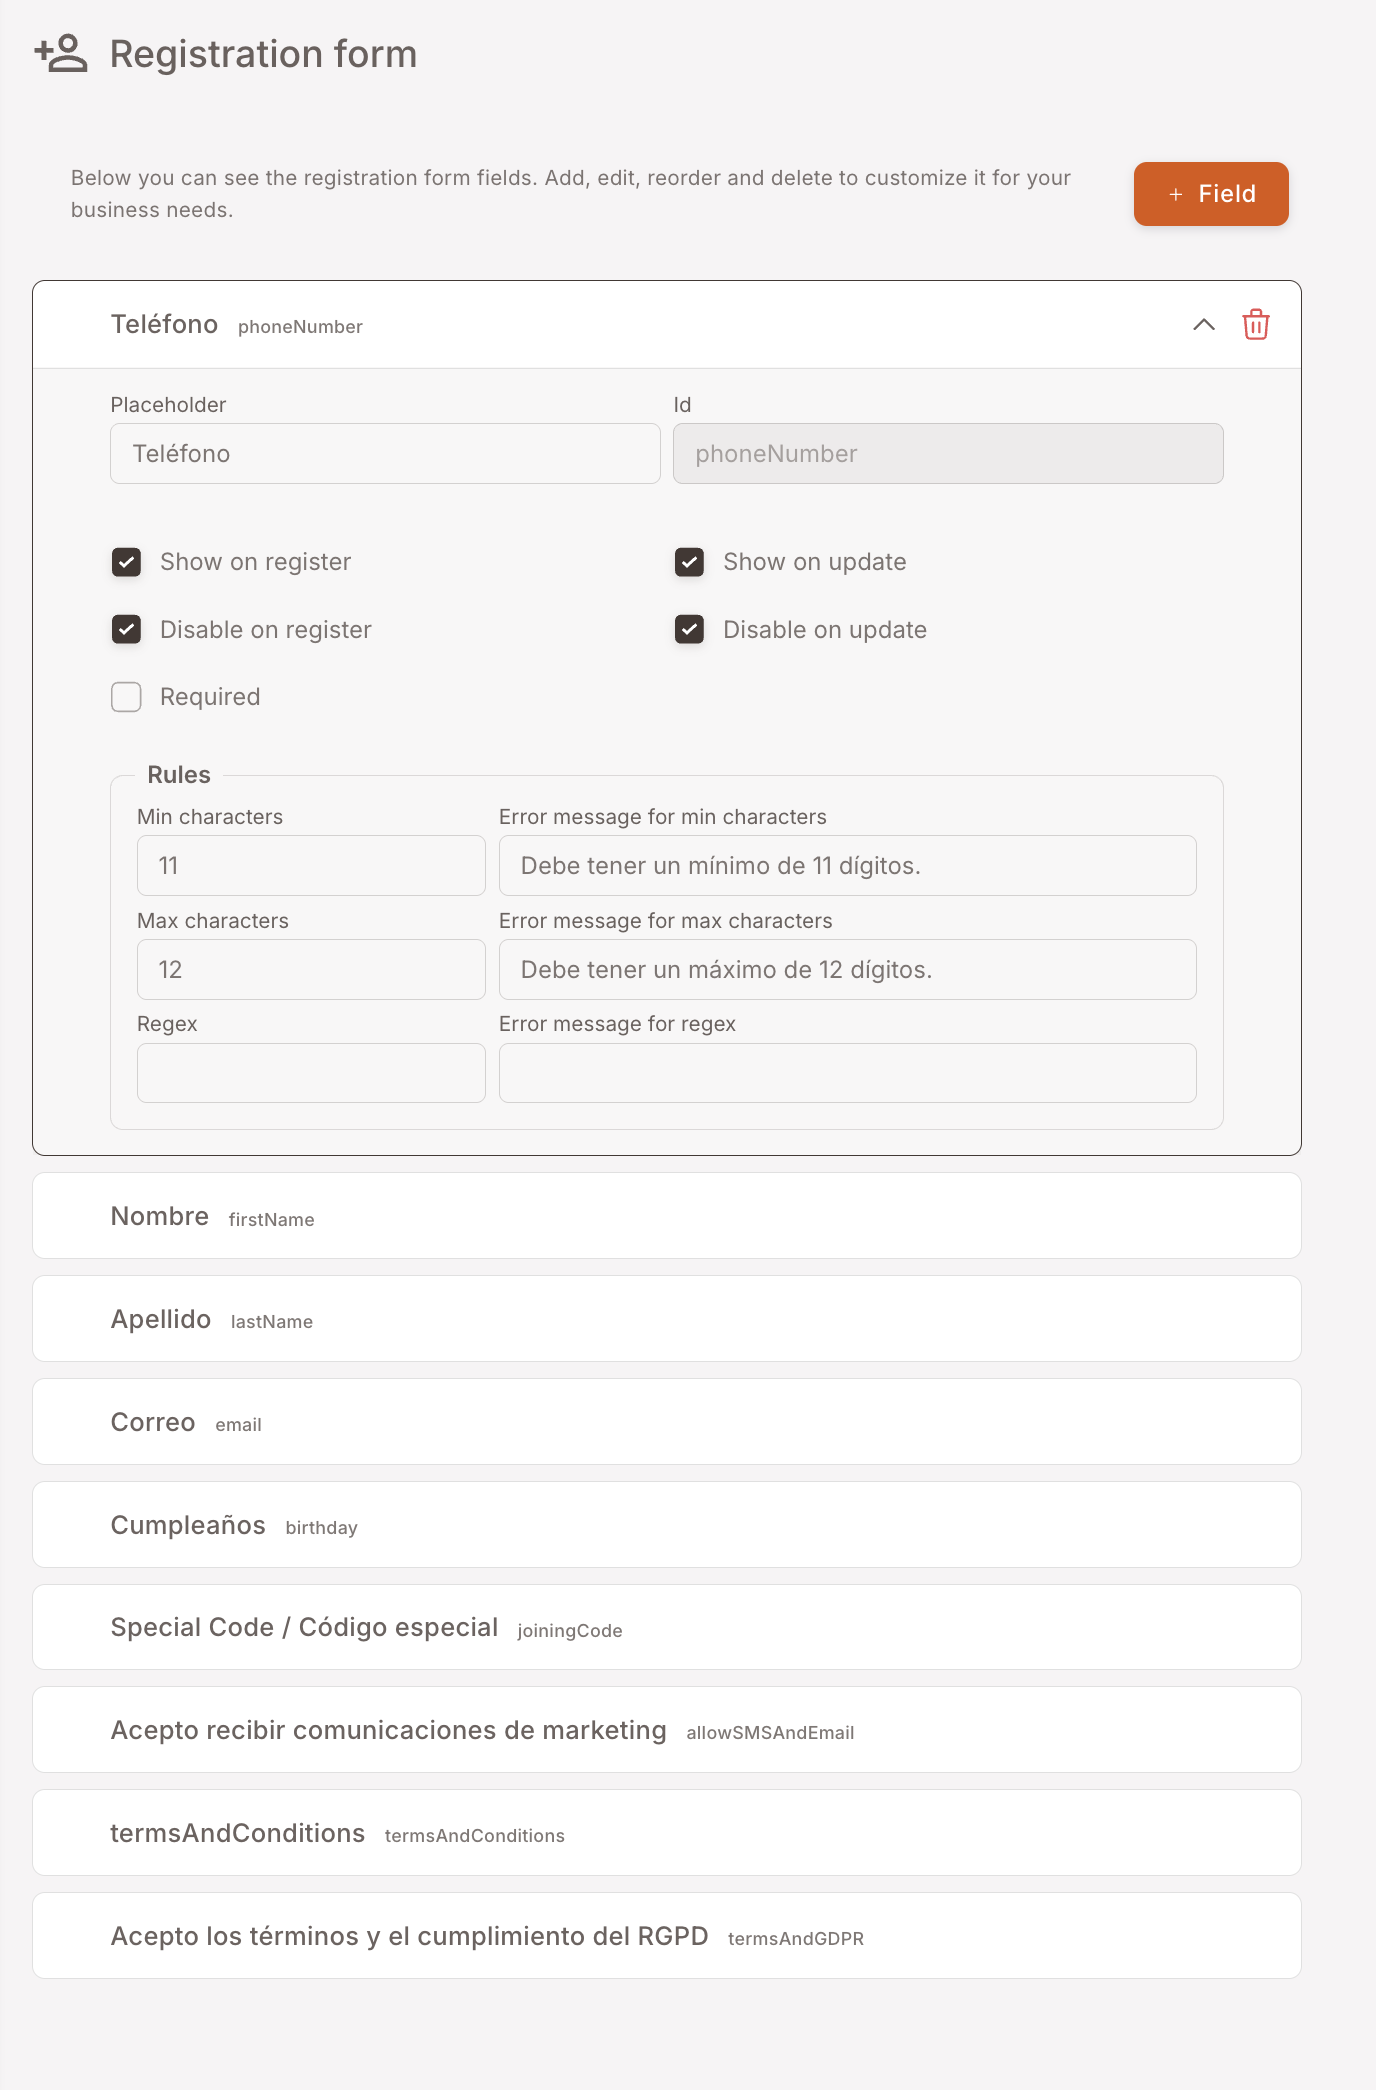
The page lists every field on the registration form as an expandable card. Each card has the field's name (e.g. Teléfono, Nombre, Apellido, Correo, Cumpleaños, Special Code, Acepto recibir comunicaciones de marketing, termsAndConditions, Acepto los términos y el cumplimiento del RGPD) plus its underlying id in light text (e.g. phoneNumber, firstName, lastName, email, birthday, joiningCode, allowSMSAndEmail, termsAndConditions, termsAndGDPR).
Click a card to expand. Each field has these controls:
- Placeholder — the greyed-in hint text shown before the user types.
- Id — the underlying identifier (changing this is rare and risky — it's what the POS / API uses to identify the field).
- Show on register / Show on update — checkboxes for whether the field appears on the public registration form and the in-app profile-update form. Independent.
- Disable on register / Disable on update — checkboxes for whether the field is read-only on each form.
- Required — checkbox.
- Rules — Min characters, Max characters, Regex (with corresponding error messages for each).
A + Field button at the top right lets you add a brand-new custom field if the standard ones don't cover what you need to collect.
When to touch this
- Adding a new question to the form (e.g. favourite product category, customer dietary preferences) — click + Field, define id and label, add validation rules, place it where you want in the order.
- Removing a field that's adding friction — uncheck Show on register (don't delete; you might want it back). Members who haven't filled it stay where they are.
- Tightening or loosening validation — adjust min/max or regex.
- Translating placeholders or error messages — change the strings inline.
Reordering
Drag-and-drop the cards to reorder. The order in the management panel is the order members see on the public form. Required fields generally go first, optional ones later, consents at the bottom.
Consents are special
The last three fields in the standard form are member consents:
- allowSMSAndEmail — communication consent for the loyalty program's marketing channels.
- termsAndConditions — agreement to the terms of use document configured under Legals.
- termsAndGDPR — agreement to the GDPR / privacy document configured under Legals.
These are typically required and shouldn't be removed — they're the basis for being able to send marketing communications and store member data legally. The actual document URLs (what gets shown when the member clicks "view terms") are configured under Legals; this page just controls the checkbox itself.
Gotchas
3 things to watch for
- Don't change the Id of an existing field. The id is what the API and POS use to identify the field; changing it on a live form will break integrations that submit to it. If you want a different label, change the placeholder, not the id. New custom fields you create can have whatever id you want.
- Disabling on update isn't the same as hiding. Disable on update means the field shows but is read-only — useful for things like phone number or email that you don't want members editing themselves. Show on update off means the field doesn't show at all in the in-app profile.
- Custom fields don't auto-flow to BI/Reports. A new custom field appears on the form and gets stored on the member, but reporting on it (e.g. show me all members whose dietary preference is vegan) requires the field to be wired up in BI/Reports separately. Talk to your integrator before adding a field you intend to segment on.