General settings
The General settings page is where the club's core operational behaviour is configured: whether POS Deals fire, the staff-credit add-on, registration-from-POS, the tier program, favourite-item exclusions, login identifier (phone or email), the multicountry phone-prefix list, and the payment / cashback rules. Most of these are set at launch and rarely change — the few that do (tier program, allow non-member deals, payment rate) are called out below.
Screenshots on this page show one merchant's setup (Spanish labels). Your Hub displays the labels and content you configure for your own program.
The page is one long form split into five cards: General settings, Features settings, URLs, Verification Settings, and Payment settings. Each card holds related fields; you can scroll the whole page or jump to the section you care about.

Top card — fixed-at-launch fields
The top General settings card holds fields that almost never change after launch: phone-number prefix, business plan, validity periods for short codes and temporary tokens, time zone, currency. If any of these are wrong, your integrator should fix them at the tenant level — touching them after the club has live members causes side-effects (currency mismatches, identification breakage). Leave alone unless you're being walked through a specific change.
Features settings
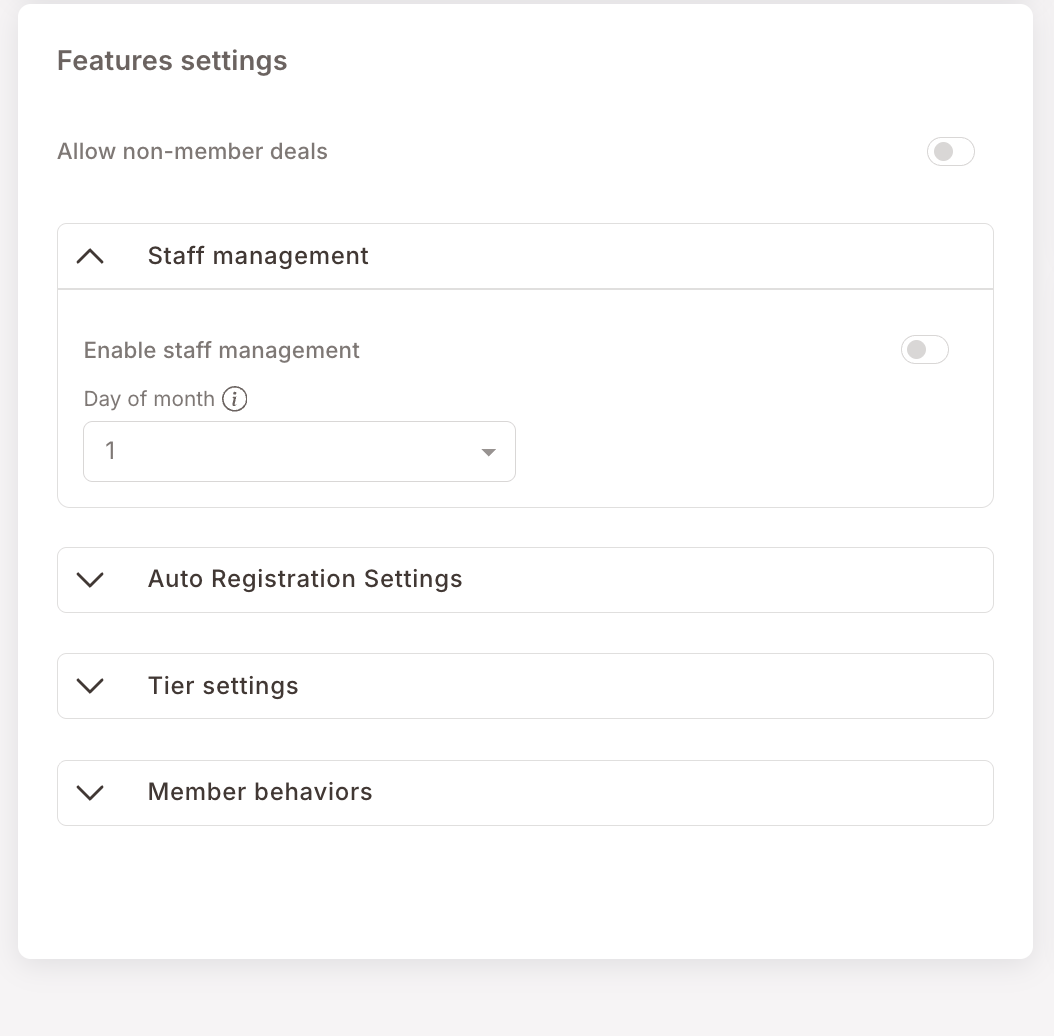
This is the card with the most variety. One toggle plus four collapsible accordions.
Allow non-member deals
A single toggle. Must be active for POS Deal campaigns to apply at the till. If you've configured a POS Deal but it isn't firing on real checks, the first thing to check is whether this toggle is on.
Staff management
For clubs using the staff-credits add-on — sets the day of month credits upload
The add-on for managing staff discounts and credits. If your business is using the platform to grant monthly credits to employees (members tagged Staff), this is where you set the day of the month the credit gets uploaded to the employee's account.
Touch this only if (a) you've signed up for the staff-management add-on and (b) you want to change the upload day. Otherwise leave alone.
Auto Registration Settings
For clubs supporting registration from the POS via a special SKU
If your POS supports the registration-from-POS flow (member signs up at the till by buying a specific item), this is where it's configured. Toggle Allow Auto Registration from POS on, and set the Registration Item Code to the SKU your POS uses to represent that registration item.
Most clubs aren't using this flow. Leave it off unless your POS partner has set you up for it.
Tier settings
Optional tier program — Bronze/Silver/Gold or similar; powers the wallet-app progress bar
Tiers are an optional progression mechanic — Bronze → Silver → Gold, Newcomer → Regular → VIP, etc. Members move up tiers as they accumulate something (credits, points, total spend, or visit count), and the loyalty web app shows a progress bar with how far they are along their current tier and how much remains to the next.
Pick the Tier type dropdown to decide what the tiering keys off:

- Credits — tier based on credits earned (typically the cashback currency).
- Points — tier based on points earned.
- Total spent — tier based on lifetime spend.
- Visit — tier based on number of qualifying purchases.
Then build the tier list (Add new tier) — each tier has a name and the threshold at which the member enters it.
Members see this as a progress-bar widget in their wallet — current balance on the left, current tier badge on the right, a fill bar showing how far through the current tier they are, and a one-line caption with the distance to the next level:
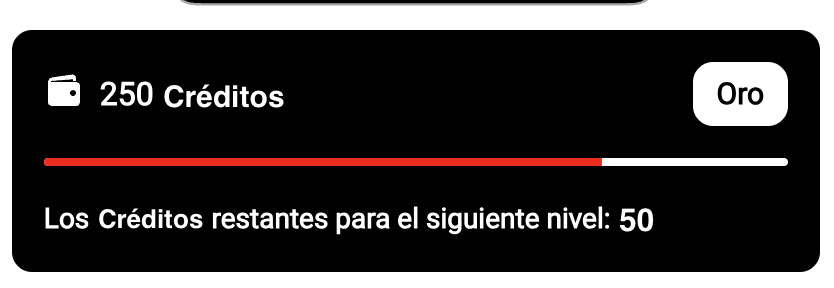
The same widget surfaces in both the Web app and on the back of the Wallet Pass.
Change tier thresholds occasionally (re-balancing the program); change the type rarely — moving from Visit-based to Spend-based tiering after launch resets every member's progress.
The Tier settings here decide what the tier-progress widget displays (which currency tiers are keyed off, the tier names, and the thresholds). They do not decide what happens when a member crosses into a tier. To give a Gold-tier member a bigger discount, a welcome SMS, or any other tier-specific benefit, build a Smart Campaign (typically a Rule on Tagged or a Deal scoped to the tier tag). The tier configuration and the perks live in two separate surfaces by design.
Member behaviors
Excludes generic items (bread, water) from the per-member favourite-items computation
This is where you control the favourite items logic on member profiles. The platform computes each member's most-purchased items and shows them in the Member profile → Behaviors panel. Without exclusions, generic items like bread or bottled water would show up as everyone's favourite — useless for segmentation.
The Active toggle turns the exclusion list on. Then add the item codes (or department codes) you want to exclude.
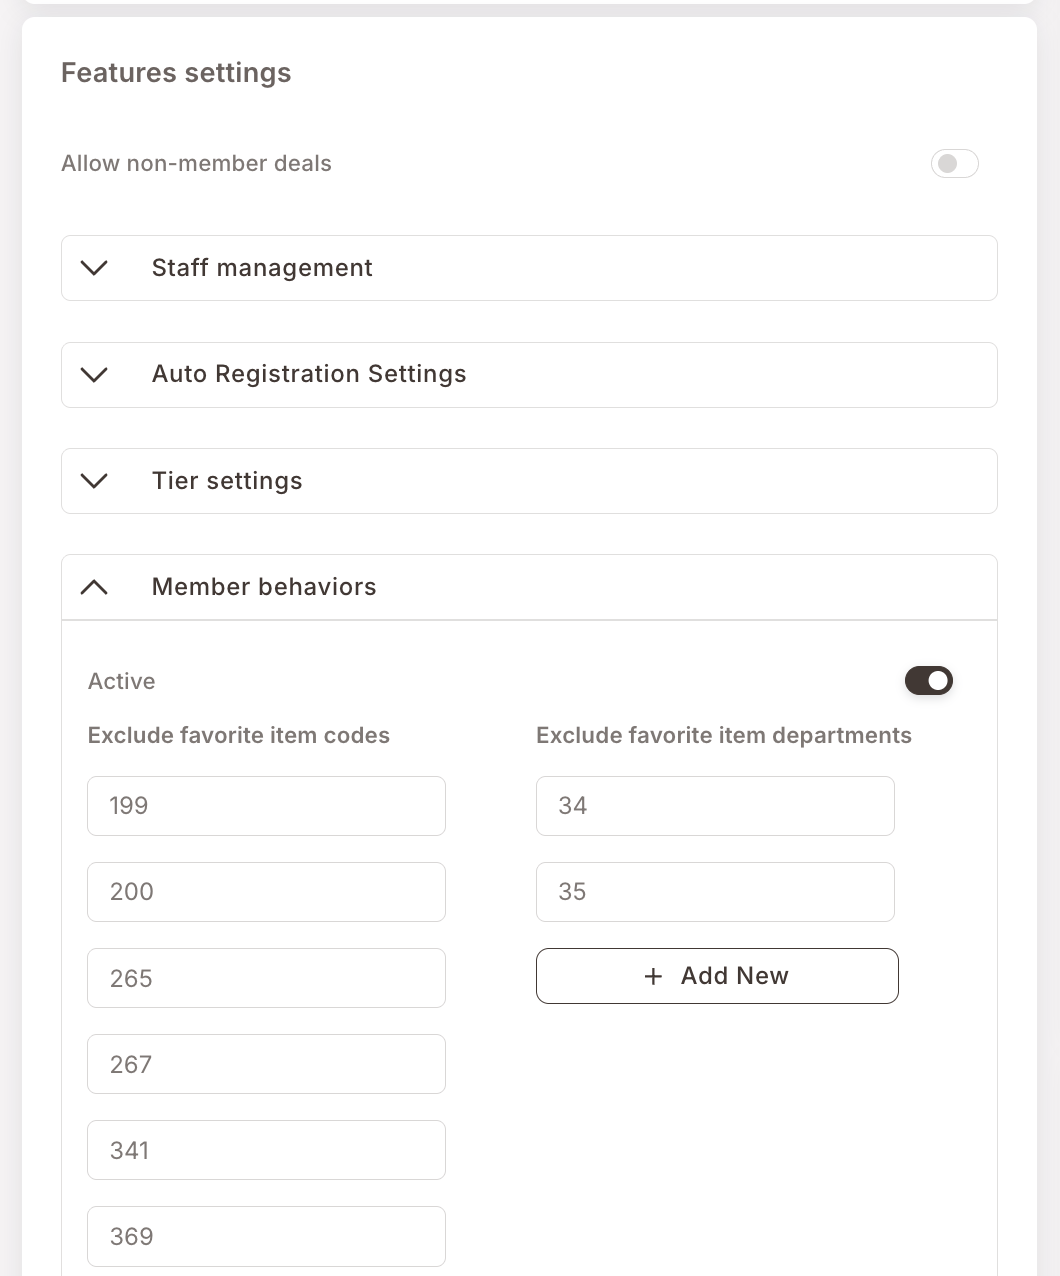
Two columns: Exclude favorite item codes (specific products) and Exclude favorite item departments (whole categories). Items in either list are skipped when computing favourites.
Touch this whenever you launch a new generic item that's polluting the favourites for many members.
URLs
The Main URL and Fallback URL of the loyalty web app. Configured at launch; don't change unless your hosting setup changes.
Verification Settings
How members log in to the loyalty web app and how the verification code (OTP) gets to them.
The Login Identifier dropdown picks Phone Number or Email — and this is a fundamental choice for the club. A club operates on either phone number or email as the unique identifier; you can't mix.
- Phone Number — the OTP is sent by SMS. Most common in Spanish / European retail.
- Email — the OTP is sent by email. More common in B2B or longer-relationship loyalty programs.
The Message Body template is what gets sent. The Short Code token is the OTP placeholder.
Multicountry support
For clubs serving members across more than one country — defaults, country list
Below the verification template are the country-handling fields:
- Multi country — toggle on if the club serves members in more than one country (different phone-number prefixes).
- Default country — the country whose code shows in the form by default. For a Spanish-market club, set this to Spain.
- Only countries — restricts the country list to a subset (e.g. France, Portugal alongside the default Spain). Leave empty to show all countries.
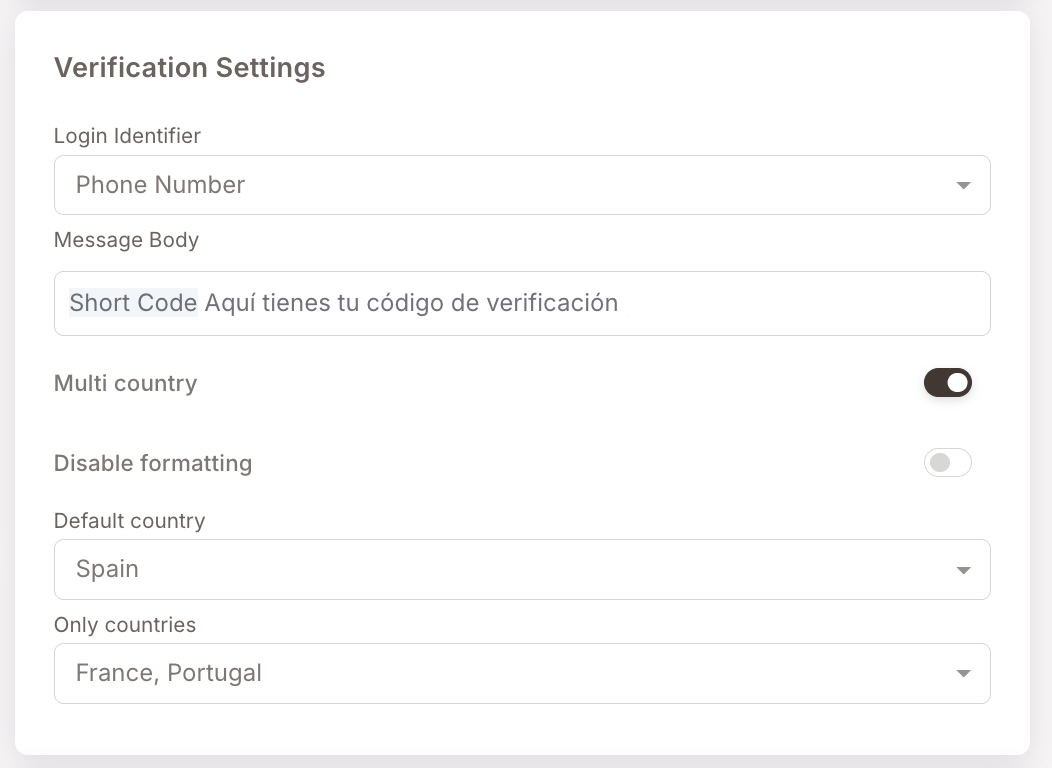
The Disable formatting toggle alongside Multi country is for an edge case in phone-number formatting that isn't worth covering here — leave it as configured.
Payment settings
This is the card where the cashback / pay-with-credits behaviour is wired up.
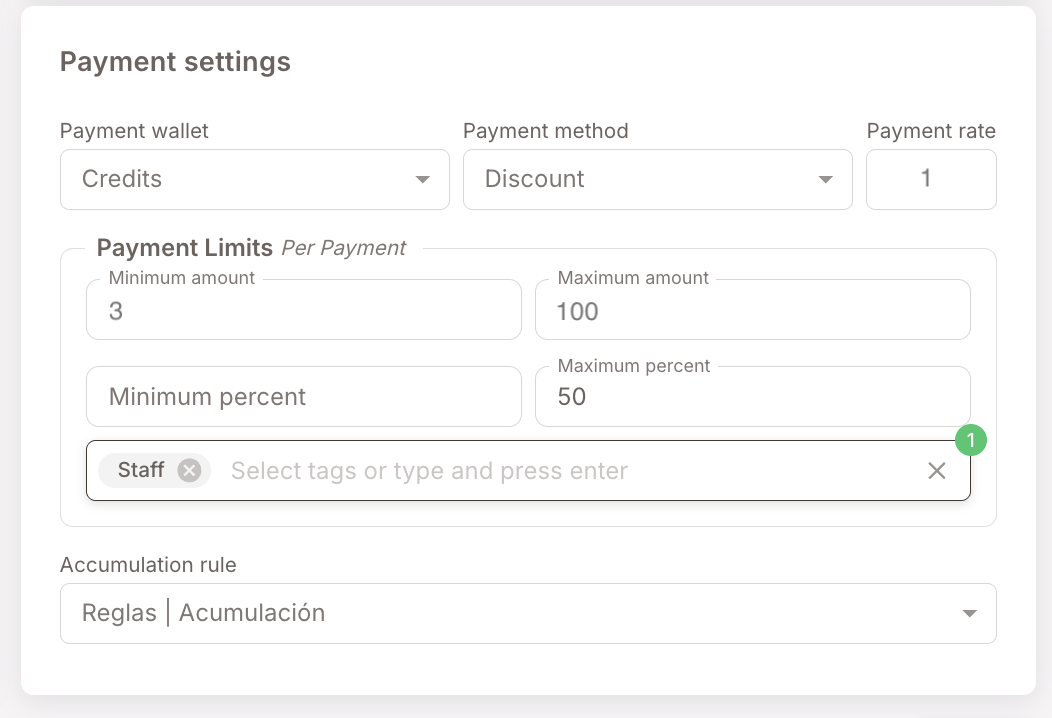
The fields:
- Payment wallet — Credits or Points. For cashback programs, this must be Credits. Credits are the cash-equivalent currency; points are scoring-only and can't pay for things.
- Payment method — how a "pay with credits / points" action is reflected on the sales ticket. Discount is the most common option (the credit shows up as a discount line on the receipt).
- Payment rate — the conversion rate. Default is
1(1 credit = 1 euro). Set to100to mean 100 credits = 1 euro, etc. - Payment Limits Per Payment — Minimum amount, Maximum amount, Minimum percent, Maximum percent. These cap how much of a single check can be paid with credits — useful to prevent members from clearing their balance on a single big purchase, or to require a minimum out-of-pocket spend.
- Tag exclusion field (under Payment Limits) — tags listed here are exempt from the min/max payment constraints. The canonical use is to put
Staffhere so employees can pay 100% of a check with their credits even though regular members can't. - Accumulation rule — the Rule that grants credits / points back on each purchase. Pick the cashback Rule you've configured under Smart Campaigns.
Most clubs set these once at launch. The Payment rate and the Payment Limits are the values that occasionally change as the program tunes its economics.
Save
Click Save in the bottom-right of the page to persist any changes. Changes don't take effect until Save is clicked.
Gotchas
4 things to watch for in General settings
- Login Identifier is essentially permanent. Switching from Phone Number to Email (or vice versa) after the club has live members is a major operation — you're effectively re-keying every member. Set this correctly at launch and leave alone.
- Allow non-member deals must be on for POS Deals. A POS Deal will silently not fire if this toggle is off, with no error visible to the cashier or the marketer.
- Tier type changes invalidate progress. Moving from Visit to Total spent (or any other change) resets the progression for every member. Plan tier-type changes around a clean cutover, not mid-program.
- The exclude-tags field on Payment Limits is a tag list, not an audience. Type a tag name, press enter, and it appears as a chip. Members holding any listed tag are exempt from the per-payment limits — there's no AND/OR logic, it's "any of these tags."